
A short and easy guide to growing Garden Giants (and other wood-rotting fungi) at home
Let’s say you are the sort of lazy forager that doesn’t like to walk far to obtain their forage. Our hunter-gatherer ancestors thought the same way, banding together to form agricultural societies, cultivating and domesticating wild species for the purpose of establishing a regular supply of produce to feed more people, trade and pay taxes (this was a mistake and we must go back).
This tutorial was originally written for Totally Wild UK.

Our ancestors were domesticated by wheat so 75% of the population has to sit on a computer and look at spreadsheets all day.
Source – @StaysafeTV on X
Despite enjoying long foraging forays to search for elusive wild mushrooms (that rarely appear in the exact same spot year on year), I have also walked in the hubris-filled footprints of ancient mankind and domesticated some mushrooms in my garden. Or have they domesticated me? I tend to their every environmental need, every nutritional whim, I make sure their wood chip stays damp and shaded when it is sunny, I feed them new wood each spring, in return they pop up a tasty treat once a year in return for my service. I have been conditioned, like a dog being fed treats, by the dopamine hit of spying the beginnings of a fruiting body emerging from the dirt in the late summer. I continue to take care of the mycelial mass so I may be able to taste another flush if I am suitably well-behaved.
The mushrooms in question are the King Stropharia, also known as the Garden Giant, or Wine Cap. They are extremely easy to grow and reproduce if you get your conditions right, they produce large, striking mushrooms that are very tasty and versatile in the kitchen, they are a huge win for the permaculture/forager’s garden. To reliably grow them, you will need to create a wood chip bed, this can either be done large scale directly on your garden/raised beds, or smaller scale in (still reasonably large) pots.
Wine Caps are full of vitamins D and B, helping normal function of the immune system during the year. They also taste lovely.
Wine Caps are saprotrophic mushrooms, meaning they feed off rotting wood, in our case, this will be wood chips, like the variety you see in children’s play parks or outside shopping centres. Laying a wood-chip bed in your garden is beneficial to the ecosystem as a whole, the saprotrophs feeding off the chips will eventually break them down, releasing nutrients back into the soil, effectively turning your layer of wood chips into slow-release fertiliser. Planting mushroom chip beds in and around your flower/vegetable beds will improve the growth of the plants concerned, the fungi working to provide extra nutrients for the plants, while the plants provide shade and moisture for the fungi.
For the chip bed to work, you need a location that gets some sun, but not intense sun throughout the day or the chips will dry out. An ideal setting is in a raised bed with lots of pre-existing plants that create shade, or in and around hedges and flower beds that receive partial sun.
The method of cultivation is quite simple. Obtain some Wine Cap mycelium (the white “root” network of the fungus, some cardboard, wood chips and have a ready location (as discussed above) to lay all of this down. The other thing you need is patience, which we will discuss later. The tutorial below should work for any other types of forest-floor saprotrophs that grow in a similar manner.
I recommend planting these beds in spring, once threat of frost has passed, to ensure they have time to establish before the heat and dryness of summer begins.
For my setup, I used the following:
1x bag of Wine Cap spawn (mycelium mixed with growing medium, usually sawdust)
- Bought online, you don’t need much, even 100g will get your garden off to a good start. You can also obtain spawn from a friend, or indeed forage some if you’re lucky enough to spot Wine Caps growing wild.
Cardboard sheets
- Take apart some plain boxes from your recycling bin. Avoid anything with coloured inks or laminates, as those chemicals will potentially be broken down and ingested by your plants and fungi.
Hard wood chips
- This is a subjective measure based on the area you’d like to cover. I created a layer of chips approx. 3 inches deep, but you can add more depth if budget allows, meaning it will take longer for the mycelium to eat through your beds. The added depth also means that more moisture is locked in during summer, improving the odds of survival for your fungi.
- We use hard wood specifically, things like Beech, Oak, etc. as the mushrooms prefer it to soft woods and it takes more time to break down.
Sawdust
- This was used to supplement the wood chips and provide a mix of morsel sizes for the mycelium to eat. The sawdust is a quick win for the mushrooms, think of it like eating an energy bar before running home to eat a roast dinner.
Dirt
- Not to be forgotten. Dirt is key to the success of your Wine Caps. Unlike oyster mushrooms for example, forest floor wood rotters need certain bacteria in the soil to trigger the development of their fruiting bodies. This grow probably won’t work if you dump wood chips on shingle or tarmac for instance. Make sure to place your wood chip bed on top of soil.

Wine Cap spawn, grown on wood chip (see the fluffy white parts? That’s the mycelium growing)
How to do it.
In early spring, order or locate your Wine Cap spawn. If buying online, it should arrive in a sealed bag and look like sawdust that’s gone furry and white. This is the mycelium ready grown and waiting to expand itself into your garden.
Next, prep your materials. Select your area to lay your wood chip bed. If you have bought a small quantity of spawn, start with a smaller area for the initial bed. Once the bed is colonised later in the year, you will have an ample supply of fresh mushroom spawn to spread further around your garden.
Mix together sawdust and wood chips in a 1:2 ratio. You can elect to sterilise the mixture before putting it on the garden to help kill off any competitors for your fungi, I didn’t do this, as the volume of wood chips that I had was too great to effectively sterilise with hot water. Working outside, the medium will quickly be exposed to rogue spores and contaminants anyway. I am of the opinion that survival of the fittest is key to succeeding in permaculture, if your Wine Caps can’t fight off competing fungi, it’s possible their genetics were poor, so try selecting from another vendor. You may also end up with interesting guests in your garden (I have spotted elf cups and oysterlings growing in my chip piles, despite having not introduced them myself).
First layer of Wine Cap spawn being laid on wood chip
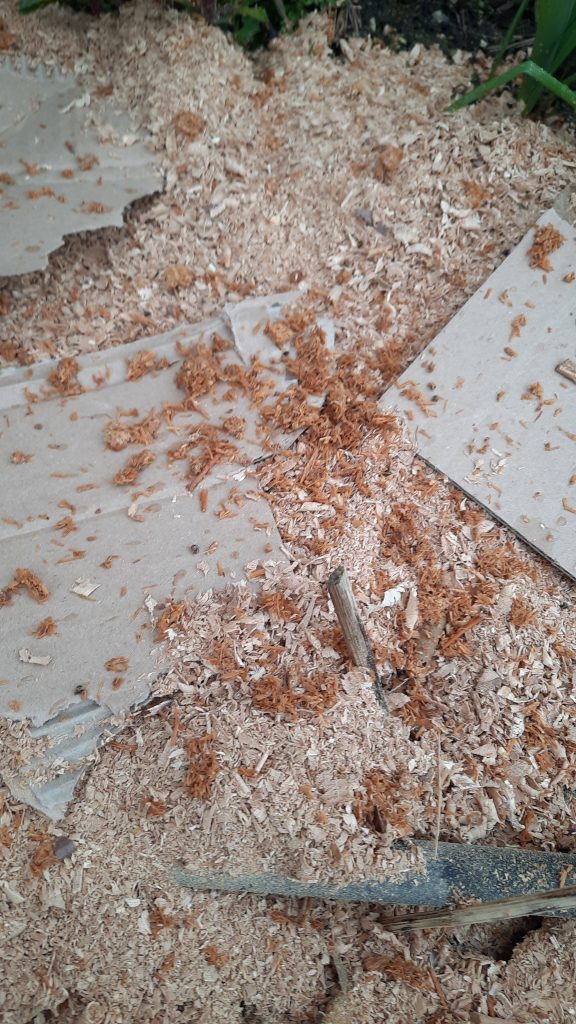
Once your wine cap spawn has arrived, start laying down your cardboard sheets on the bare dirt where you are setting up your bed. Lay one layer of card, then break up the Wine Cap bag spawn and sprinkle a small amount onto the cardboard. Do not be afraid if your spawn breaks down very finely, each mycelial thread is self-healing and will continue to grow from even tiny fragments. Eventually they will grow to the point that they will all re-join and merge together into a large network.

Chip bed covered in cardboard to lock in moisture
Cover the mycelium with your wood chip/sawdust mix and dampen with water. Repeat this step until you have at minimum three layers of cardboard, spawn and wood chips, all damp (not waterlogged).
Finally, cover your wood chip with another layer of cardboard, to help keep in moisture for the first few weeks. If you have done this in spring and live in the UK, moisture should not be an issue. If you live in less rainy climes, water your bed once a week and give it a good soak.
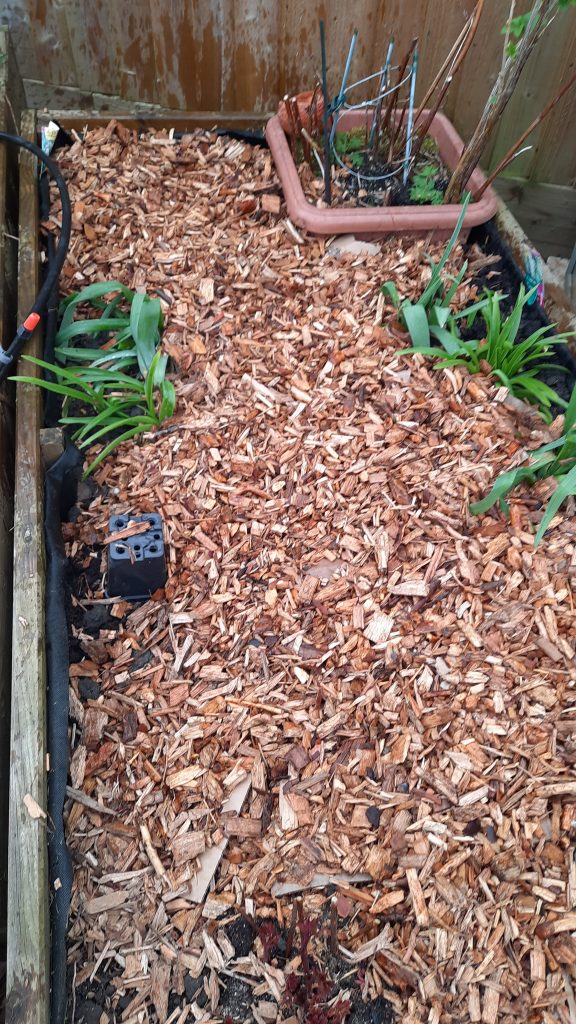
Freshly laid wood chip bed
An extra layer of chips was added to cover the cardboard for neatness
The next step is patience.
I performed sporadic health checks on my mycelium. By health checks, I mean I would poke around in the chip bed every week or so, impatiently, to see if anything was growing. Luckily Wine Caps don’t mind being disturbed, and seem to respond well to gardening around them while they grow. In late spring I dug through the chip bed to add some extra plants, this aided in spreading the mycelium around. Eventually, much to my satisfaction, I saw the beginning of white threads, spreading their way slowly from sawdust to chip, and at some point threading thicker root-like structures into the soil itself.
Over summer I kept a sprinkler system operating on the beds on a daily basis. This can be mimicked very easily by giving the bed a good sprinkle with a watering can in the evenings after the sun is no longer scorching the beds. If conditions become unfavourable, the mycelium will go dormant and then resume growth when things improve.

The forerunners push through the dirt – August 2024
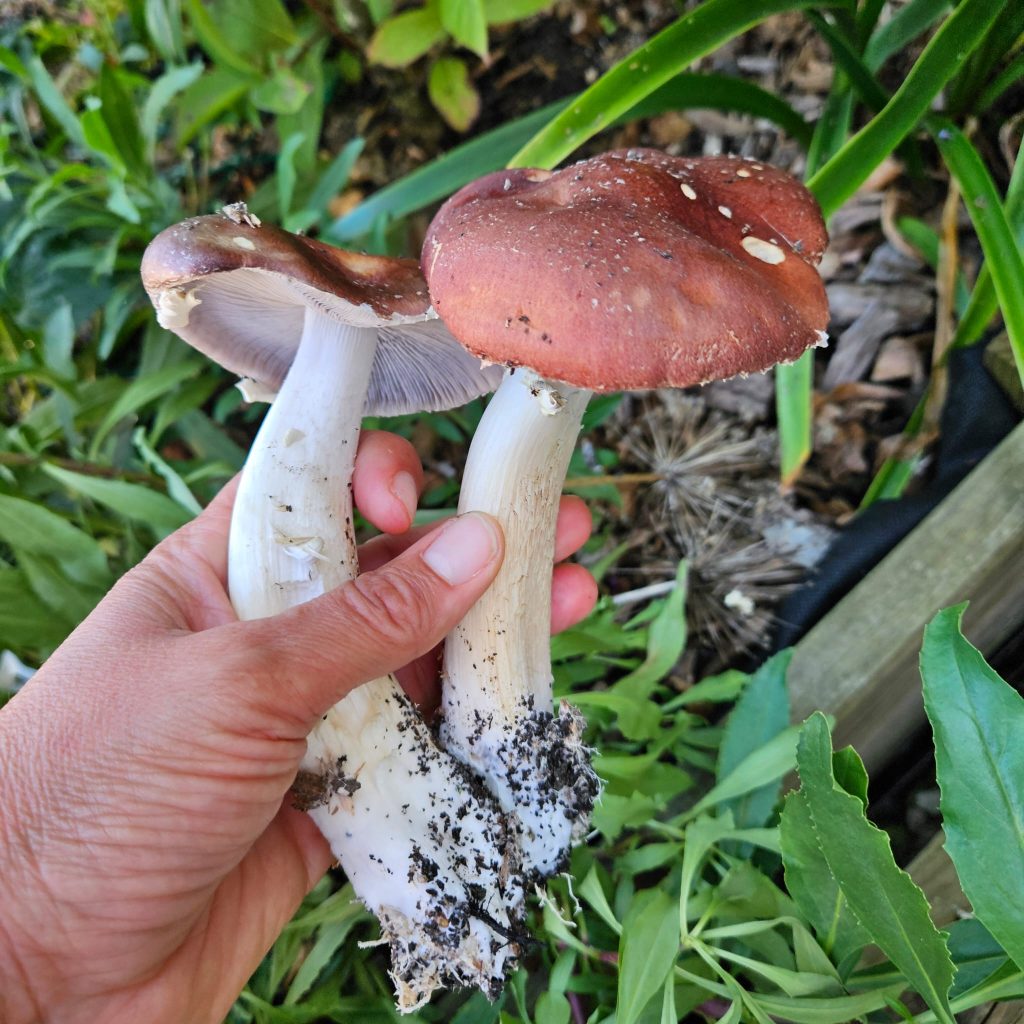
Finally, in late August, the first red caps started to push their way out of the dirt!
The first reward for careful maintenance over a period of 6 months. I harvested a large bag-full of the mushrooms, being careful to double check and identify what I had grown was definitely Wine Caps. Even if you buy spawn from a reputable company, it is very advisable to ID anything you grow, as there is no way of visually telling until the mushroom actually fruits.
The beds put out a regular stream of mushrooms for a couple of weeks, before autumn began and they resumed their growing and spreading phase.
Eating
Cook your Wine Caps thoroughly. I fried mine in butter, salt, white wine and garlic. This flavour combination brings out the best in most mushrooms without masking their individual flavour. Your Wine Caps can be used in place of supermarket mushrooms, put them in risotto, make ketchup from them, or dehydrate them and use them as soup stock.
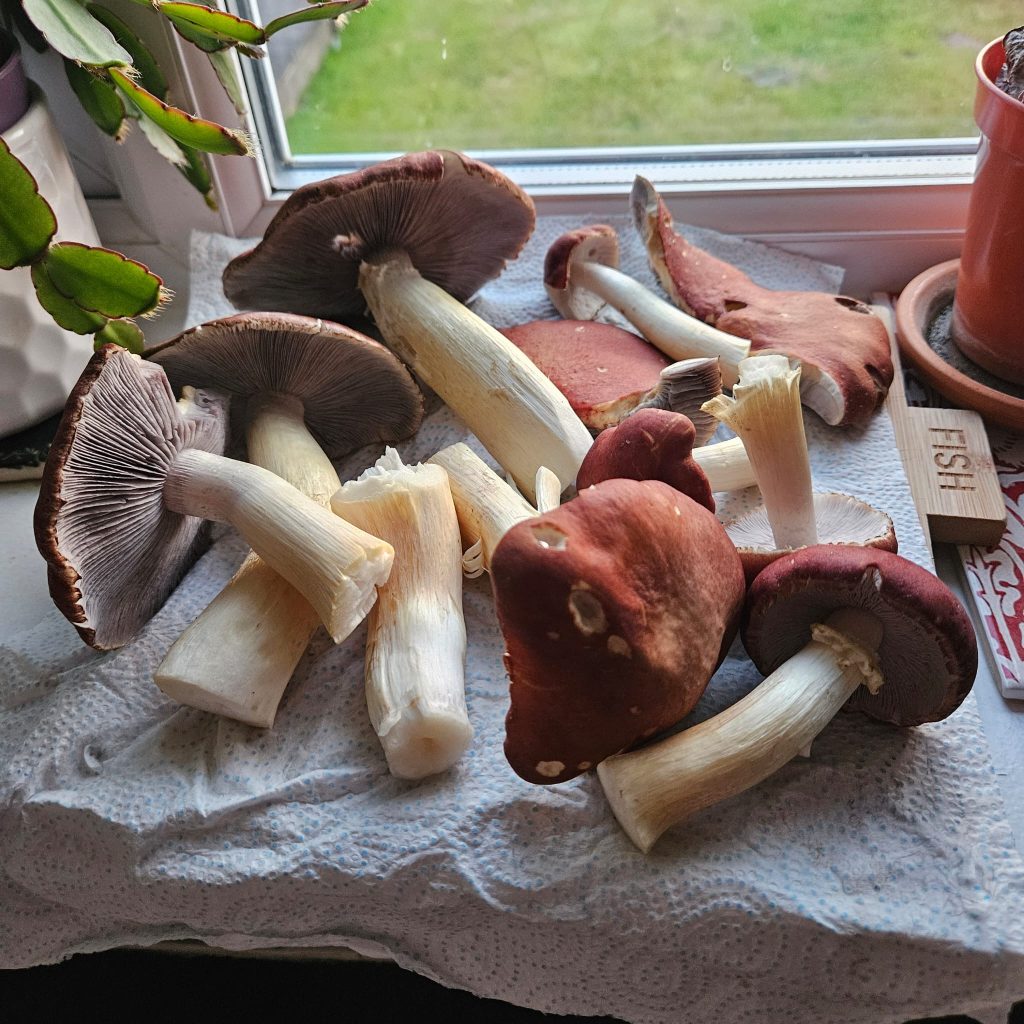
First yield of Wine Caps – August 2024
Maintenance
Your wood chip bed will continue to yield mushrooms for you, year on year, as long as you keep it topped up with fresh wood every year or so and the environmental conditions stay favourable.
Your bed should be almost fully colonised after a year, meaning you can break apart the mycelial mass and spread it to other wood chip beds in your garden, or gift it to friends.
If you have a local park or another place that had piles of untouched wood chip, you can experiment with some guerrilla gardening and spread some of your home-grown mushroom spawn to these piles to see if they take. Some of these chip piles could be treated with chemicals to prevent rotting, so not every attempt will be a success. When you do succeed however, you gain the satisfaction of having spread the gift of edible mushrooms for the public good (or indeed for your own selfish gain). I do note that Wine Caps are not native to the UK, so caution should be exercised before carelessly releasing them into habitats where other rare fungi might grow.
Conclusion
Growing Wine Caps is a fantastic way to learn about the full life cycle of fungi, whilst feeding yourself, friends and family with a healthy and homegrown mushroom. Saprotrophs benefit your garden as well, being an excellent companion to already established plants.
At the beginning of this article, I mused about whether I had domesticated the mushroom, or had it domesticated me. Which way this two-sided coin of philosophical debate lands is very much open to your own opinion and perception. What stands out from my points above, is the now rebellious nature of practicing a combination of foraging and permaculture in the modern world. Growing grain may have domesticated our ancestors and caused them to settle, rejecting their nomadic lifestyles in place of food security, eventually creating what we now know as modern society. Growing anything on a smallholding in the modern day may allow instead a certain degree of financial freedom, despite still being tied to the land in order to maintain it. This, combined with foraging for your food and trading (items, knowledge and skills) with likeminded friends, neighbours and strangers on the internet, has the potential to establish a new sort of culture, one that combines the old and the new, spreading like the mycelial networks we strive to cultivate. Perhaps one that will benefit us, and the environment, moreso than one of mass consumption.
Learning self-sufficiency may look like an archaism when faced with the modern life of convenience and instant gratification. From my perspective, becoming more self-sufficient is freeing, in the face of gigantic, homogenising market forces. Re-connecting with the land and working with it, is perhaps now the opposite of domesticity. Whether I have been domesticated by the mushroom or I have domesticated it, I feel a freer man when growing and eating them, than when I’m buying off the shelves of a large supermarket.

Credit – SamsaGregor on Imgflip